Force Buttercup
Boulogne, 23 May 1940
by Frank Donald, son of Lt Cdr Colin D.W. Donald RN, the CO of HMS Vimy
Before the evacuation of the Welsh and Irish Guards from Boulogne could take place the harbour area had to be made safe for the destroyers to enter and berth alongside. Force Buttercup was sent to Boulogne early on 23 May 1940 to secure the immediate port area while 20th Guards Brigade (Welsh and Irish Guards) held the outer perimeter. Buttercup would also provide cover for the Naval Reserve Demolition Party once the decision was made to destroy port facilities.
Force Buttercup consisted
of four platoons of seamen from Chatham Naval Barracks, and two Royal
Marine platoons with a section of machine guns and a medical party. The
force was under the overall command of Major C F L Holford RM, with the
Naval element commanded by Acting Lieutenant J E James RN.
The
Demolition Party was commanded by Lieutenant Commander A E P Welman DSO
DSC, who had had a spectacular career in Coastal Forces in WW1 and had
spent the interwar years in various high profile positions in London,
including that of Commandant Metropolitan Special Constabulary (Thames
Division). There was also a Demolition Party XD (G), from the Kent Fortress Royal Engineers
(KFRE), led by Captain Bernard Buxton. Their function was to destroy
the port’s oil stocks to prevent them falling into German hands. In
fact there were no oil stocks in Boulogne so the Royal Engineers
assisted Lt Cdr Welman's Naval party, preparing two bridges for demolition.
**************
Force Buttercup and the Demolition Party were taken to Boulogne in HMS Vimy (Lt Cdr C G W Donald) arriving at 1136/23. After disembarking Force Buttercup Vimy embarked the remaining elements of Rear General Headquarters and wounded. While the wounded were still being embarked Vimy was engaged with small HE shell from either a tank or a field gun all of which burst over and astern. Vimy slipped at 1212 and while she was turning in the inner harbour entrance several salvoes burst close by.
The main source of information on Force Buttercup’s operations is a file from the National Archives Naval Party landed to Cover Demolitions at Boulogne May 1940. Recommendations for Honours and Awards (ADM1/11241). This contains Reports of Proceedings from the commanders of Numbers 3 and 4 Naval platoons. Lieutenant James, he officer in command, had been gravely wounded on the afternoon of the 23rd and a report submitted by Company HQ ommited many key facts and failed to reflect the bravery and leadership of Lt James and two Senior Ratings. The platoon commanders reports were submitted in December 1940, when Lieutenant James was still in hospital.
Mr P Dawkins, a member of Number 2 Naval Platoon, was interviewed for the BBC Peoples War website in 2005. Dawkins had joined the Navy as a Boy Seaman and in May 1940 was an OD (Ordinary Seaman) in Chatham Barracks. In "Two Days before Dunkirk" he gives a colourful account of what would have been an extremely confusing situation, in sharp contrast to the measured tone of the report by the two RNVR Platoon Commanders.
The best way to understand the course of
events is to read these reports but this brief summary and the
maps and observations which follow will be helpful.
The Map
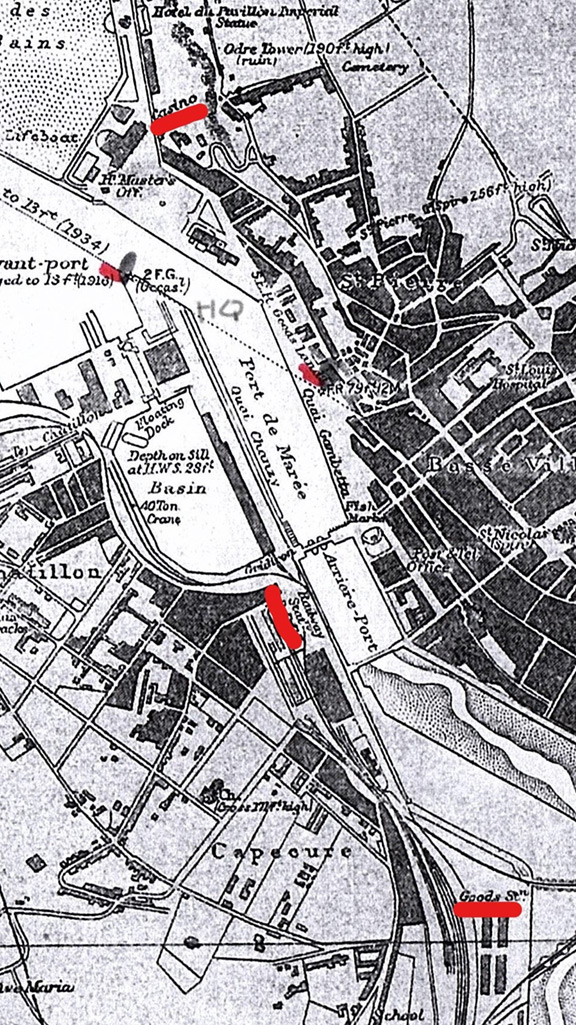
Left: Admiralty Chart 438 (1938) used by the destroyers during the Evacuation of the Guards from Boulogne
Right: The sketch map of the harbour in the report of the Naval Landing Party (ADM 1/11241)
Chart 348 is courtesy of the UK Hydrographic Office
The lettering on the sketch map has been redrawn by Frank Donald - click twice on map to view full size
The Platoon Commanders’ reports are accompanied by a map which appears to have been drawn from memory (see above right). It shows an additional bridge upstream of the Pont Marguet, and is incorrect on the layout at the seaward end of the basin. According to the map the Royal Marine platoons were deployed in the area of the Casino, where Colonel Dean’s (AMPC) Pioneers were manning roadblocks.
The map shows two railway stations. Station No 1, Company HQ, was the Gare Maritime, adjacent to 20th Guards Brigade HQ. Station No 2 was the Gare Centrale, which no longer exists. The map also shows an area of railway lines which was probably a Goods Station shown on Admiralty Chart 438.
Position A (No 3 Platoon) on the map is clearly in the vicinity of the southern end of the Pont Marguet. Position B marks the road block established by 2 Platoon outside the Gare Centrale, mentioned by Mr Dawkins. The fork in the road at position C (No 4 Platoon) is probably in the vicinity of the Goods Station.
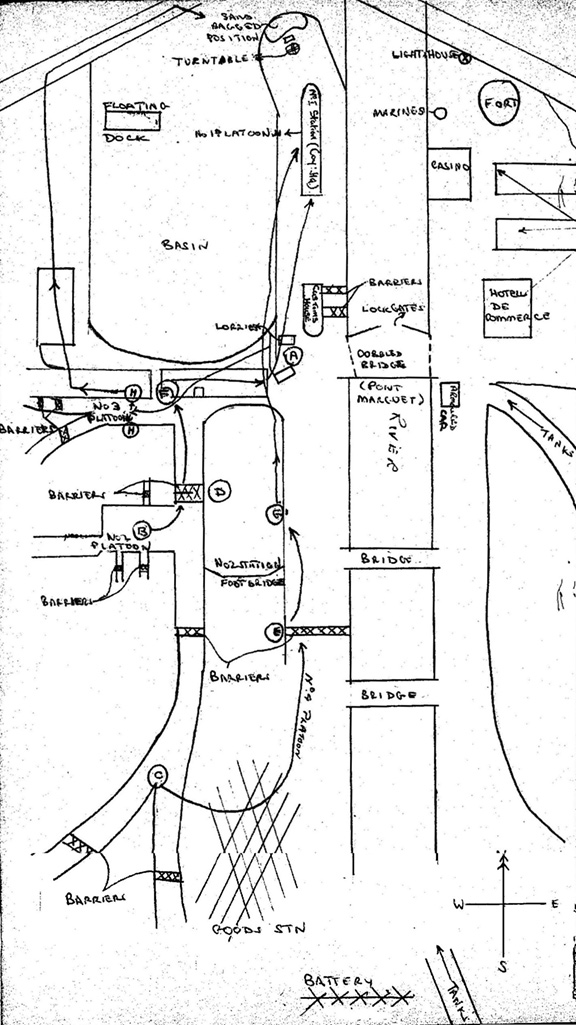
The sandbagged defensive position north of the turntable on the Gare Maritime where the Guards made their last stand
Copyright reserved
Operations
The Naval platoons operated south of the Liane, and so was in the Irish Guards Sector. The three advanced platoons were useful rallying points for detached troops. No 3 Platoon encountered a Sergeant and 15 men of the Irish Guards at Position A prior to 1400 who were subsequently employed by Lieutenant James on road block construction. No 4 Platoon rescued twenty plus Belgian officers and soldiers who joined with and provided valuable assistance to the platoon.
According to Mr Dawkins, No 2 Platoon seems to have lost cohesion after Sub Lt Gems, the Platoon Commander, was wounded, but Dawkins and two others continued to man the road block, and were taken charge of by a Sergeant with a Bren gun (probably Irish Guards, though Dawkins believed him to have been from a Scottish regiment). According to the map, and the report by the Commander of 3 Platoon (Sub Lt Byndon Ayres), they retired to position F, where they held on until 1600 when they retired through houses (or over roof tops) to the Company HQ at the Gare Maritime. Mr Dawkins went via a café.
It was as well that Mr Dawkins did not encounter the “Sergeant” in Welsh Guards uniform who tried to lure No 2 Platoon to another barricade. Petty Officer Gunners Mate Vinter went forward to inspect the new position, and noticed that the Sergeant had him covered with a Mauser pistol. PO Vinter shot him and found a German uniform underneath his battle dress. Bearing in mind that the incident took place south of the Liane a Welsh Guards NCO would have been out of area.
It is not completely clear when Lieutenant James was gravely wounded, but as No 2 Platoon was ordered by him to retire at 1600 it appears this took place shortly afterwards. The “stragglers” who caused the incident were most likely to have been from No 2 Platoon.
We have no information on the fate of the Royal Marine Platoons and supporting units except that “by 1530 the Germans had occupied the whole of Boulogne except a bridgehead, all anti- tank guns were out of action, and half of Major Holford’s force were estimated to the casualties” [The Evacuation from Dunkirk: Operation Dynamo, 26 May - 4 June 1940; W J R Gardner, Admiralty, Historical Section].
Demolition Operations at Boulogne
The following account is from the chapter on Destroyers in The Navy in Action
(Hodder and Staughton, 1940) by the popular author of maritime books,
Henry Taprell Dorling (1883-1968), who wrote under the pseudonym of Taffrail.
The author states that it is told by a "Naval Eye-Witness who had been
sent to the port on an independent mission". By 1940 Dorling was
working for the Ministry of Information using his reputation and name
to give the public authentic morale boosting accounts of the war at
sea.
"The Demolition Party
were required to fit demolition charges, and to earmark all the
bridges, cranes, lock-gates, machine shops, pumping stations and the
like which should be destroyed when the time came, This was to be
undertaken at the request of the French authorities. The Gare Maritime
came under fire from enemy field guns when the seamen were inside
fitting detonators to their explosive charges. Some of them were quite
young men who had never been under fire, but they just carried on with
their jobs with bits of the roof flying around and casualties
occurring. They never turned a hair.
As the enemy closed in the demolition of all the bridges and important points was decided upon, and small parties of seamen went out with their parcels of explosives. Already the swing bridges giving access to the inner part of the harbour were under fire of machine-guns at a range of a few hundreds of yards. The explosives were placed by the bridges, though they could not be destroyed until the last of our troops had withdrawn.
Meanwhile in another part of the harbour was a large crane, with a wet dock beside it containing a naval trawler. Both might be captured by the enemy, so the officer in charge decided to destroy them, with the power-house and pumping station for the dock, without waiting for further orders. He did so, though the crane did not collapse as expected. It was eventually brought crashing down by a few rounds from a destroyer alongside the jetty. While all this was going on the enemy were all round the docks at a range of about 400 yards, and snipers were within 50 yards of the crane.
Another small naval party were searching the docks for any ships which might assist in the final evacuation. They found one small vessel of the drifter type, in which some stokers raised steam in record time by using bits of packing cases and anything combustible they could lay their hands on.
The fire from field and machine-guns continued, as did the bombing. Then came the long-expected orders – 'Complete demolition'.
The floating dock was sunk, and machinery, power-houses and the like blown up. The hinges of some dock-gates were demolished, another trawler, another crane – anything that might be of use to the enemy. The work was necessarily hurried, and in the midst of it the demolition parties were harassed by dive bombing and machine-gun attack by fifteen enemy aircraft. These were put to flight by RAF fighters."
Comparison with the report of No 3 Platoon Commander, Sub Lt Byndon Ayres, indicates that the bulk of the demolition work took place before 1800, when there was a lull and half his platoon went onboard the Keith for dinner. One of the demolition parties was led by the Force Buttercup Company CPO, Chief Gunners Mate Luland, who was wounded at 1800. The Sub Lt times the air attack on Vimy and Keith as 1830 which agrees with other information.
"Further charges were placed to make certain of the sluice gates and bridge (Pont Marguet)."
The blowing of the bridge seems to have taken place after Whitshed and Vimiera had gone alongside at 1930. According to Lt Col Sir Alexander Stanier, CO of the Welsh Guards “I … met Billy Fox-Pitt on the bridge, which gives access to the quay and we checked everybody through except, of course, No 3 Company. He said “I can’t wait any longer, I am going to blow the bridge”, which we then did, rather unsuccessfully as it happened, but we did enough damage to prevent vehicles getting through”. This explains how Lt Col Dean was able to withdraw his Pioneers from their road blocks to the quay later on in the evening.
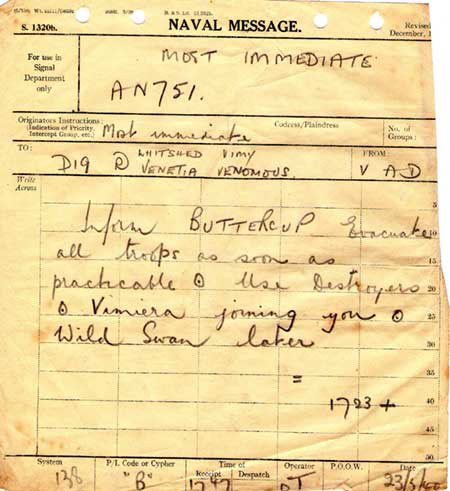 |
This signal headed "MOST IMMEDIATE" sent by Bertram Ramsay, Vice Admiral
Dover (VAD), who was directing operations from Dover Castle,
to the destroyers of the 19th DF off Boulogne starts with "Inform
BUTTERCUP" before giving the order to "evacuate all troops as soon as
possible". Eric Pountney, the Wireless Telegraphy Operator on HMS Venomous, kept copies of all signals received and sent during the evacuation of the Welsh and Irish Guards from Boulogne. There was no need to preserve radio silence as the destroyers were in close contact with the enemy and their positions were known. The signals record events as they happened while the outcome was still in doubt. The time at which signals were sent was given using the 24 hour clock. It was released at 1723/23, sent to the Dover WT office, encrypted before transmission and decrypted on arrival. The signal was received by HMS Venomous at 1747. |
Evacuation of Force Buttercup
Lt John E James RN may have been evacuated earlier with the wounded on another destroyer but Mr Dawkins (No 2 Naval Platoon, Chatham) self evacuated onboard the Keith at the very last minute before she left at 18.43:
"We were ordered
off by the captain on board by a loud hailer saying he would not
take Naval personnel, he was immediately killed by enemy fire. The loud
hailer said now that the ship was leaving and anyone who could make it
across could do so, I thought 'blow this, I don’t want spend the rest
of the war as prisoner, I will chance it!'; the destroyer was
already moving astern, I grabbed my rifle, ran across the jetty and
jumped, fortunately the tide was low and I managed it over the guard
rails and landed on top of some soldiers. No one was hurt." See his personal story on the BBC Peoplers War website
No 3
Platoon were already aboard Keith having been sent onboard for dinner. The other half of the
platoon left in Whitshed at 2020. The remaining members of the Force Buttercup and the Demolition Parties left onboard HMS Windsor at 2230.
These times are taken from the chronology of events at Boulogne assembled by Frank Donald.
Remarks
Petty Officer Vinter had served with my father, by then Captain of the Vimy, and they had a brief conversation on the crossing from Dover of a “Hello Vinter, what are you doing here?” nature. I met the then Sub Lieutenant Vinter in 1957, when he was part of the post refit trials crew of the Reserve Fleet minesweeper HMS Rifleman, and I was a Wardroom guest. Ironically, we took a film crew and actors to sea to shoot a clip for the Dunkirk film, the version starring John Mills and Richard Attenborough released in 1958.
According to HMS Whitshed’s Report of Proceedings, the wood across the river fired on by No 3 Platoon after Keith left had been occupied by the Welsh Guards during the afternoon.
It is fortunate that the armoured car that was enfilading the Pont Marguet was vulnerable to Anti-Tank Rifle fire, and that the multitalented Chief Petty Officer Luland was there to use it. The Heinkel 59 Float Plane destroyed by CPO Luland was a twin engined biplane used either for reconnaissance or mine laying. As there was a Storch spotter aircraft on task it is more likely that the H 59’s role was to lay mines under cover of the air raid. Boulogne Harbour was a mine danger area, and the destroyers needed to have serviceable degaussing equipment to operate there. As the Keith’s DG equipment had been destroyed, Commander Conder, Captain of Whitshed, who succeeded Captain Simson as Senior Office, was happy for her to return to Dover, but was displeased that Vimy, whose DG was serviceable, did not remain off Boulogne even though her Captain had been mortally wounded.
From Whitshed’s
Report of Proceeding the “Seamen of the Demolition Party”, probably
Number 1 Platoon stationed at Company HQ, did good work keeping the
ship clear of non combatant Pioneers when alongside in the afternoon
and again in the evening. However one doubtful issue concerns
indiscriminate firing from the vicinity of Brigade HQ near the Gare
Maritime experienced by both the Welsh Guards and the AMPC (Pioneers)
manning road blocks near the Casino. Colonel Deane, commanding the
AMPC, drove to Brigade HQ to enlist the Brigadier’s support in putting
a stop to the firing. The Brigadier “promised to do all he could but
was unsure whether the few Guardsmen at Brigade HQ could successfully
bring such a large body of obviously nervous men under control.” [Boulogne, Jon Cooksey, Pen and Sword Books 2002]
There does appear to have been a coordination problem here, as by late afternoon three Naval platoons would have been available to keep order on the jetty. It is strange that the Brigadier was unaware of this.
Future Events
Major C F L Holford was awarded the DSO, and became an Acting Lieutenant Colonel in 1942. He had various shore appointments, finishing as Naval Provost Marshal and Senior Officer Royal Marines on the staff of CinC Portsmouth from 1945 – 48.
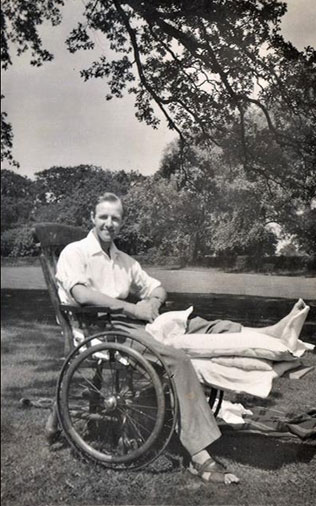 |
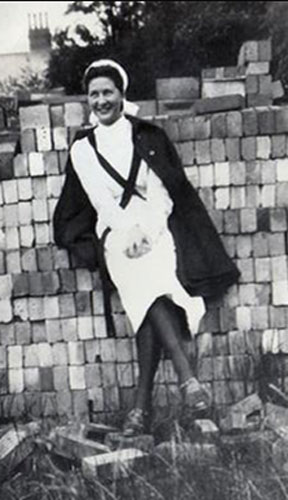
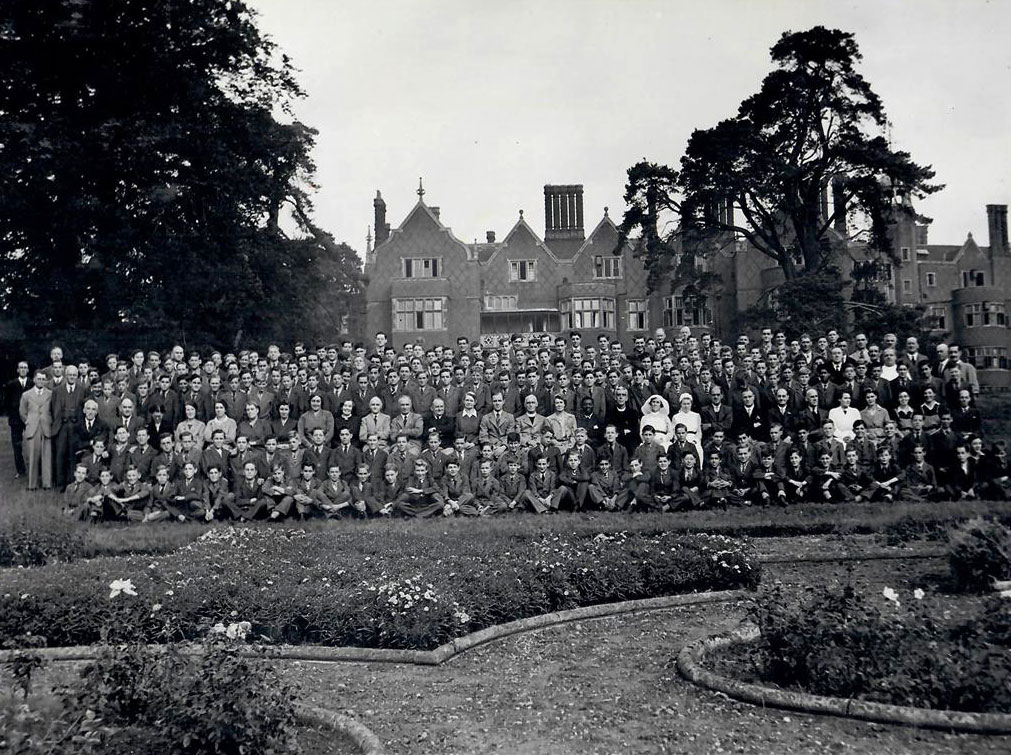
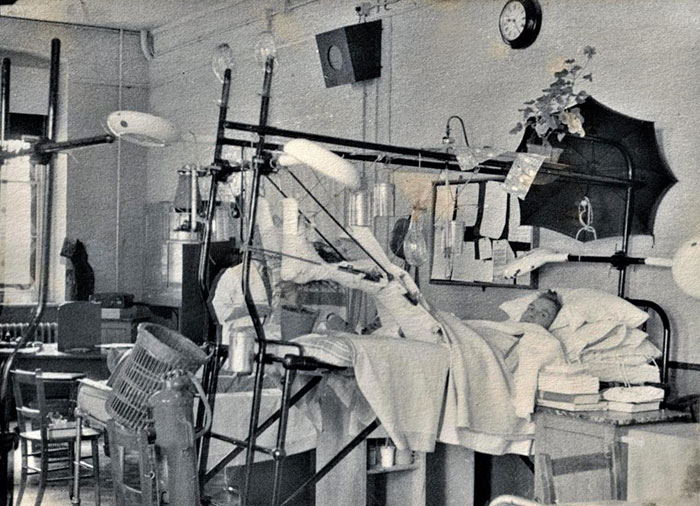 In Leavesden Hospital
Convalescing at Hill End Hospital and his future wife Nurse Coxwell at Hill End The staff and pupils of the William Baker Technical School at Goldings |
 |
Lt John Edward Jame, SC, RN rose "through the hawse pipe". He was born on the 5th April 1911, the son of Charles E. James, a Sergeant in the RAMC, and Florence Owens who worked in domestic service, a modest family background. His Mother died when he was eight of Spanish Flu and when he joined the Navy as a 15 year old boy sailor at HMS Ganges in September 1926 he was just five feet and one inch in height. He joined HMS St Vincent in June 1927 as a Boy Sailor 1st Class but by July 1932 was an Acting Leading Seaman. From then on his promotion was rapid for a man on the lower deck in the peacetime Navy. He was an Acting Petty Officer by June 1933, a Petty Officer by 1934 and an Acting Gunner in October 1935. On 1 October 1939, one month after the war started, he was commssioned as an Acting Lieutenant. He had to contend with the prejudice of officers from a more conventional background for men whose natural ability had enabled them to rise "through the hawse pipe" from the lower deck. He was awarded the DSC on 12 Febrary 1941 and in 1942 confirmed in the rank of Lieutenant, backdated to 1938 and invalided out.